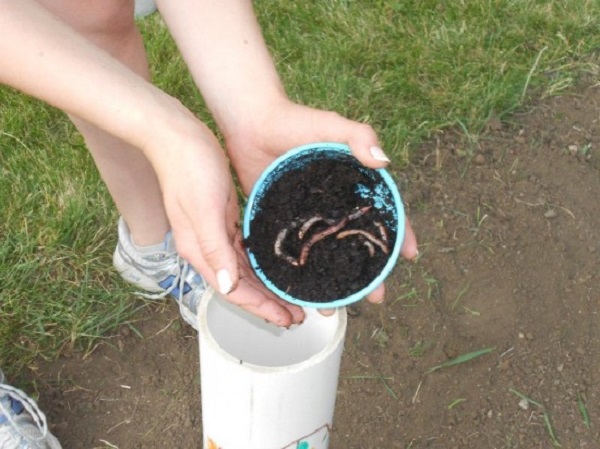
For home gardeners seeking to enhance their soil fertility and promote sustainable gardening practices, worm tubes offer an efficient and eco-friendly solution. Worm tubes, also known as vermicomposting tubes or worm towers, provide a habitat for earthworms to thrive and contribute to nutrient-rich soil. In this article, we will explore what worm tubes are, how to create them, and how home gardeners can effectively incorporate them into their gardening routine.
What are Worm Tubes?
Worm tubes are simple structures designed to house earthworms and facilitate the vermicomposting process directly in the garden. These vertical structures, typically made of plastic or PVC pipes, provide a safe environment for earthworms to live, breed, and consume organic matter, resulting in nutrient-dense vermicompost.
Creating a Worm Tube
Making a worm tube for your garden is relatively straightforward. Follow these steps to create your own worm tube:
Select a Tube
Choose a sturdy tube with a diameter of around 4 to 6 inches and a height that suits your garden’s needs. PVC pipes or recycled plastic containers work well for this purpose.
Drill Holes
Using a drill, create multiple holes around the tube, ensuring they are large enough for the worms to enter and exit easily. Space the holes evenly to allow for adequate airflow.
Bury the Tube
Dig a hole in your garden bed, ensuring it is deep enough to accommodate the height of the tube. Place the tube vertically in the hole, making sure that a few inches of it protrude above the ground.
Fill the Tube
Start by adding a layer of compost or partially decomposed organic matter into the tube. This provides a food source for the worms. Then, put a handful of earthworms into the tube to initiate the vermicomposting process.
Using a Worm Tube in the Garden
Once your worm tube is set up, it becomes an integral part of your gardening routine. Here’s how you can maximize its benefits:
Feed the Worms
Regularly add kitchen scraps, garden waste, and other organic materials into the tube to keep the worms well-nourished. Avoid adding meat, dairy products, or oily substances, as they can attract pests and hinder the composting process.
Maintain Moisture
Ensure that the worm tube remains moist but not overly saturated. Water the tube occasionally, especially during dry periods, to provide an optimal environment for the worms.
Harvest Vermicompost
Over time, the worms will transform the organic matter into nutrient-rich vermicompost. Periodically harvest the vermicompost from the bottom of the tube to use in your garden beds, potting soil, or as a top dressing for plants.
Additional Information
For additional information and detailed instructions on creating and using worm tubes, consider visiting the following websites:
Gardeningsolutions.ifas.ufl.edu
The University of Florida IFAS Extension provides a comprehensive guide to vermicomposting, including information on worm tubes. Their website offers practical tips and techniques for successful vermicomposting in home gardens.
The Rodale Institute is focused on organic farming and gardening practices. Their website features articles and resources on vermicomposting, including insights into worm tubes and their benefits for sustainable gardening.
Conclusion
Worm tubes are a valuable addition to any home gardener’s toolkit, offering an efficient and natural method to improve soil fertility and reduce waste. By creating a worm tube and implementing proper maintenance, gardeners can harness the power of earthworms to create nutrient-rich vermicompost right in their gardens. Get started with your own worm tube and witness the transformative impact it can have on your plants and soil health.
Related Articles & Free Email Newsletter Sign Up
Be a Worm Farmer and Make Your Own Compost
How to Have Great Compost in 3 Months


Comment here