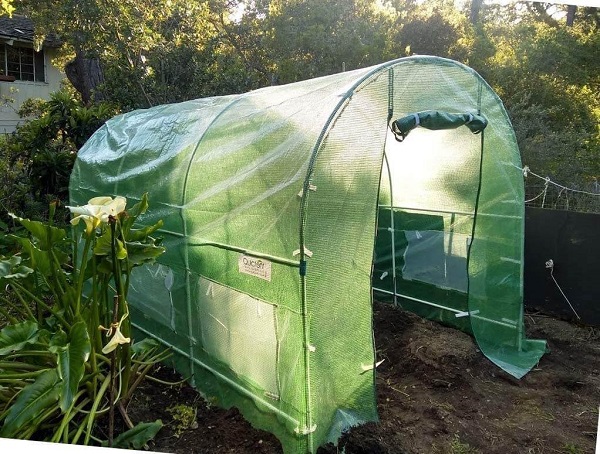
It is true that traditional greenhouses use glass or polycarbonate panels, but plastic panels can be a good alternative if you are on a tight budget. Plastic greenhouses should also be considered for larger scale growing because modern plastics are more durable, easier to clean, lighter and regulate the heat more efficiently than they have in the past.
Plastic greenhouses will still bring out the best benefits of greenhouse growing in general. Your plants will be protected, even in harsh weather conditions. You can also get an early start on the growing season in the spring and extend the growing season by a month or two in the fall arrives. Follow these steps to build a small plastic greenhouse.
Tools Needed
- Hacksaw or Pipe Cutter
- Hammer
- PVC Cement
Prepare or Purchase These Materials
- Prepare 6 pieces of ½-inch reinforced bar or rebar with each piece being 2 feet long.
- Prepare 7 pieces of white, ¾ inch diameter PVC pipe that are each 10 feet long.
- Purchase 8 large binder clips along with 4 PVC Tee slip fittings with ¾-inch measurements.
- Cut a single piece of painter’s plastic measuring approximately 12 feet by 25 feet.
Prepare the Area
Clear and smooth the surface of the area where your greenhouse will be. The finished greenhouse will be 6 feet x 14 feet so the perimeter of the prepared area should measure 7 feet by 15 feet. Identify and mark the corners of the structure as well as the center of both sides, which can be found by measuring 3 feet from each end.
Use the hammer to pound a single piece of rebar into the ground for each corner as well as the midpoint of the sides. The rebar should be driven into the ground to a depth of at least 12 inches. Use a hacksaw or pipe cutter cut 2 pieces of PVC pipe that are 3 feet long out of one of the 10 foot long pieces. These will be used for center supports. Cut another 3-inch piece out of the same PVC pipe.
Start Building the Frame
Glue a Tee slip to 4 of the remaining 10 foot pieces of PVC pipe. Combine two full-length PVC pipes end to end by applying glue so they can connect to the Tee slip fitting. Attach one of the 3-foot pieces to that Tee slip to create a perpendicular connection. Do this again with the remaining pair of 10-foot PVC pipes.
Mark one of the 10-foot pieces as the back and mark the other one as the front. All of the remaining pieces should be joined as the center. Form the center section by gluing the 3-foot piece of the front part to one of 10-foot pieces remaining with a Tee fitting.
Use the glue once again to attach the 3-inch piece to the Tee fitting found on the center section. Make sure you do this in a straight line with the 10-foot PVC pipe. As a result, the Tee openings should be facing opposite directions. Form a long pipe by gluing another 10-foot PVC pipe to your creation so you have a pair of Tee fittings that are facing opposite directions. The center support pieces will be placed there.
Complete the Assembly
Complete the frame assembly by gluing the 3-foot center piece to the Tee fitting on the piece marked as the back. Allow the glue to completely dry on all the pieces of PVC before proceeding to the next step.
Insert the open end of each PVC pipe onto the rebar that was previously placed into the ground. Apply some pressure on the previous side to form an arc and insert that side onto the rebar. Finalize the plastic greenhouse by covering the frame with the large piece of painter’s plastic and securing it with the binder clips.
Background information for this article was provided by DIYGreenhousePlans.info.
Related Articles & Free Email Newsletter Sign Up
How to Build a Polycarbonate Greenhouse
How To Create a City Garden on a Small Budget
Worm Tubes: A Guide to Creating and Utilizing a Home Gardener’s Best Friend


Comment here