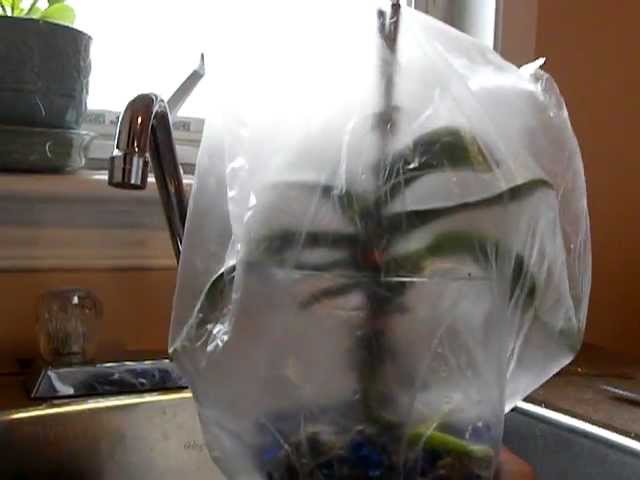
OK, you’ve managed to rot the roots off your plant, but you don’t want to lose it. What can you do? Many orchid growers resort to the old “sphag-n-bag” technique. By the way, this is good for getting new imports established, too.
First, let’s consider the needs of the plant: It needs water to survive – water is the life’s blood of the plant. It provides turgidity to the tissues and cells, it is a chemical component used in the production of the sugars during photosynthesis, and it is used by the plant to control the osmotic pressure of ions inside- and outside of the cells. So if you have no roots, how does the plant get water?
Misting is of little value, as the plant cannot take up a substantial amount of liquid water through its leaves, and the brief period that the humidity is raised by periodic misting is likely insufficient to be of much benefit. The key is maintaining high humidity, not so much because of the easier absorption of water vapor (which is the case), but because a saturated environment prevents further loss of water from the plant tissues while it attempts to grow new roots. Basically, the sphag-n-bag concept uses a small bit of damp sphagnum as a moisture supply, and a plastic bag as a “micro-greenhouse” in which the elevated humidity can be easily maintained.
That’s simple enough, but a big mistake that many folks make is placing the plant in direct contact with moss that’s too wet. The technique I use involves preparing the plant, then setting up the “rescue” environment:
Plant Preparation
- Remove any old organic media that may be sticking to the roots. If it’s difficult to remove, just wait.
- Using a sterile blade, trim off any dead or damaged roots.
- Add about one tablespoon of root stimulant to a gallon of 80°F water. Do not add fertilizer to the soaking solution, as that will tend to draw water out of the plant.
- Soak the plant for about an hour or more.
- Remove any remaining organic media – it’s bound to come off after the soaking.
Setting up the Environment
- Get a clear plastic bag large enough to comfortably hold the plant.
- Place a small amount of damp sphagnum moss in one corner of the bag. You may substitute a piece of folded-up paper towel for the moss, or just add a teaspoon of water to the bag.
- Place the plant in the bag, oriented as if growing normally, and not in direct contact with the moss or any free liquid.
- Seal the bag. If it’s a Zip-Lock, that’s easy, if not, fold over the top several times and hold it with a paper clip.
- Place it in a warm, shady location and walk away.
Placing the plant in that warm, shady location (not dark) is important: The warmth will induce some growth activity, but the shade serves to moderate the vegetative growth while the plant develops new roots. Furthermore, warmth results in a higher moisture content of the air in the bag, and the shade prevents the bag from becoming a broiler, as it would become if direct sun hits it.
In a few weeks, the plant is likely to have developed a new root system, at which point it can be repotted. Another idea for those of you who grow your plants in Semi-Hydroponic™ culture: Pot up your suffering plant and then place the plant – pot and all – in the bag. It will get all of the benefits of the sphag-n-bag environment but has the bonus of growing its roots into the medium without the need for repotting afterward.
Ray Barkalow has been growing orchids for over 45 years, and owns First Rays, which offers horticultural products to the hobby grower. You can visit his website at FirstRays.com.
Related Articles & Free Email Newsletter Sign Up
How to Achieve Proper Air Management in Orchid Culture


Comment here