There have been times in my life when I have known that what I am doing is truly the right thing. Times when my actions needed no affirmation from others for me to know, right down in my heart, that they were not only right but important. These moments can happen anywhere at any time. At work or at home, volunteering or doing a hobby, when something is right it just feels good. And one activity that has given me this feeling since the very first time I tried it is growing and propagating Shamrocks.
Shamrocks (Oxalis species) are small trifoliate (leaf structure having 3 parts) plants with delicate little flowers that bloom on a nearly continual basis. Shamrocks grow well in containers and make excellent house plants that can be placed either indoors or out, depending on the season. These plants are a true pleasure to own and their popularity is on the rise. It seems to me that 5 or 6 years ago it was a rare treat to see a Shamrock in a retail setting but now they are at every garden center and farmers market I visit. I am not surprised at how popular these plants have become. I got my first Shamrock when I was 20 years old, as a gift from my grandmother and it has been one of the most visually appealing plants I have ever owned.
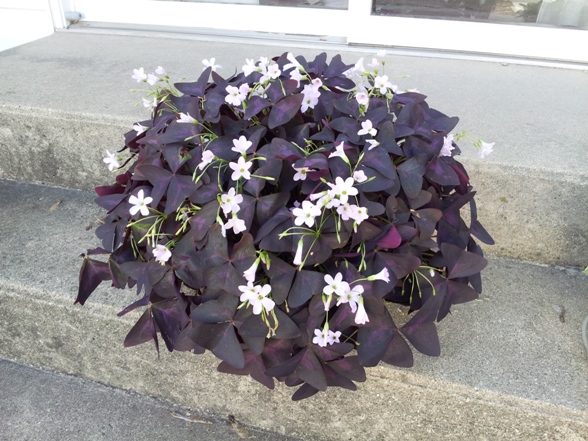
During the daylight hours the leaves stand erect on slender stems that lean aggressively towards the light. At night the leaves fold downward and stay closed firmly together. My first Shamrock has been with me for 8 years and 4 houses. I now have two plants, one green and one purple. When the Shamrocks start to get crowded in the pots I simply split them up and give some away as gifts. It’s a fun and easy way to share the plant with friends or even sell them at a place like a farmers market.
Propagation of a Shamrock can be done one of two ways. They can be started from seed but asexual reproduction is the method most growers utilize. Asexual reproduction (mode of reproduction by which offspring arise from a single parent) of a Shamrock plant is done by dividing or separating the rhizomes from one plant and then replanting them. Rhizomes are similar to plant bulbs and are found just beneath the soil. This is a relatively easy procedure that doesn’t take very long to complete.
Just follow these steps:
- Carefully remove the Shamrock, rhizomes and all, from its current pot.
- Remove any excess growing medium that may still be attached to the rhizomes and gently separate them. The rhizomes are not connected to one another and will separate easily.
- Prepare new containers with your choice of growing medium.
- Provide the Shamrocks with a well-draining soil for the best results and plant the separated rhizomes with the pointed ends facing upwards. Be sure the rhizomes aren’t planted too deep and leave just the very top of each uncovered.
- Lightly cover the exposed part of the rhizome with more growing medium and water thoroughly.
If the newly planted rhizomes still have Shamrock stems and leaves attached they will droop until the rhizomes begin to root and establish themselves. I would advise to remove any remaining top growth prior to replanting the rhizomes. New growth should appear in a few days after planting.

When caring for a growing Shamrock pay attention to a few key conditions. The first is light requirements. Shamrocks prefer moderate to bright sunlight. If the stems appear to be stretching and the leaf growth is stunted this may mean that the plant needs more light.
When watering, be sure to keep the Shamrock’s soil continuously moist but not soaking. Shamrocks do not grow well during prolonged dry periods. A well-drained growing medium will allow the grower to water frequently while avoiding the potential of over saturation, which can cause serious problems in the root zone. When watering a Shamrock allow the water to drain thoroughly from the holes in the bottom of the container. Never let the Shamrock sit in standing water. They grow best when fertilized once a month using a general purpose fertilizer such as a 10-10-10.
Like other bulb plants, Shamrocks can have a dormancy period. About twice a year the leaves can become wilted and the plant may look like it is dying. When this happens the grower can cut back on watering, remove the dying leaves and soon enough the plant will be growing strong again. Personally, I don’t allow my Shamrocks to go into their dormant stage and they grow well all year round. Growth may slow down at times but it doesn’t seem to affect the overall health and vigor of the plants. Whether to allow the dormancy stage or not is up to each individual grower.
Growing and propagating Shamrocks is a great way for novice plant owners to get used to dealing with a plant that can be split apart to form new ones. Shamrocks should be divided about every year or two. They make wonderful gifts and can also be sold for profit. They are great plants to own and can live for many years. Shamrocks make an excellent addition to any plant collection; they are both elegant and whimsical at the same time. As I stated earlier, the leaves close tight together when the sun goes down: a pleasurable event to witness ever evening. And in honor of these great little plants, I would like to close with a small poem I wrote: “When the day is done and out of sight. They close their eyes and say good night.”
Kyle Ladenburger is an avid indoor and outdoor gardener.

Comment here