
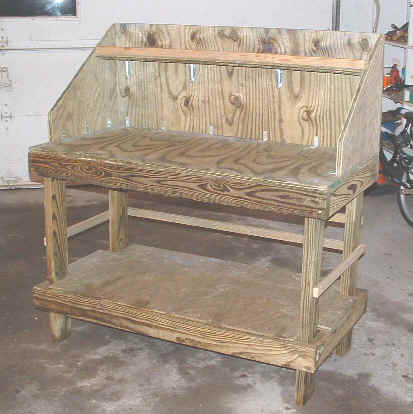
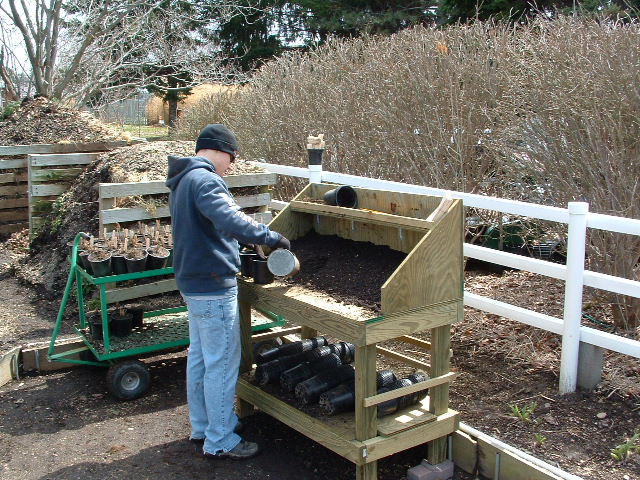
This potting bench is 48″ wide and 24″ deep and has a small shelf above the actual potting area. This upper shelf is handy for storing empty pots, pruning shears, plants, and other essentials. It also has a lower shelf for keeping a stack of pots or anything else you might need in your potting area.
Material List
I used all pressure treated lumber, but that’s up to you. The total cost for the materials was less than $100.
- 5- 2 by 4’s, 8 feet long
- 2- 1 by 2’s 8 feet long
- 1 sheet of 3/4″ treated plywood
- 15- 1-1/2″ by 5/8″ corner braces
- 4- 3″ by 4″ shelf brackets
Step One
Cut two 2 by 4’s, 48″ long, and two 2 by 4’s, 21″ long and make two frames that look like this:
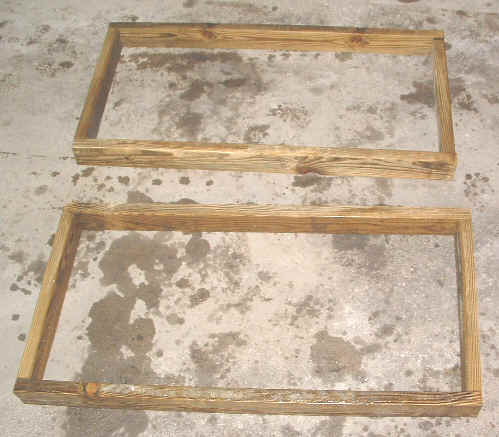
The finished size of these frames should be 48″ by 24″ on the outside.
Step Two
Cut 2 pieces of plywood 24″ by 48″. On just one of the pieces of plywood mark out each corner 5.75″ by 3.25″ as shown on the left board in the photo below and cut out the notches.
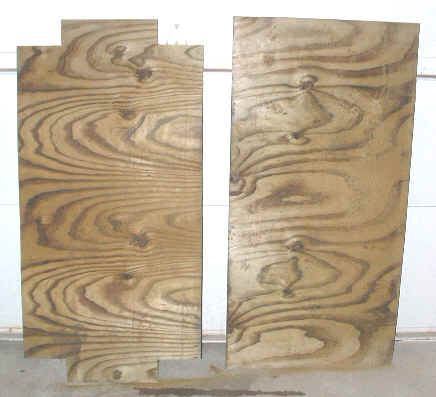
The board on the left is the bottom shelf of the potting bench and the board on the right is the top of the potting bench. Using screws or nails attach the top of the potting bench to one of the 24″ by 48″ frames that you’ve assembled. I used 1-5/8″ wood screws.
Step Three
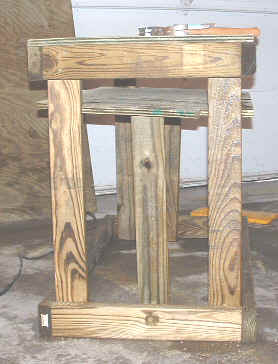
Now cut four 2 by 4’s, 34″ long. These are the potting bench legs. Lay the other 24″ by 48″ frame that you’ve assembled on the floor and then lay the 24″ by 48″ piece of plywood with the notched out corners on top of the frame, but do not attach it yet. Insert the legs into the openings in the notched out corners so the legs stand upright. Keeping the legs standing upright is a little tricky; an extra set of hands comes in quite handy here.
Carefully set the top of the potting bench over the legs as shown above. Make sure the legs are plumb and square with the top of the potting bench and begin securing them one by one to the top of the potting bench. I used 2-1/2″ wood screws and I drilled pilot holes through the 2 by 4’s before starting the screws. I then put two screws down through the top of the bench into each leg, and then from the side of the bench I put two more screws through the 2 by 4 frame into each leg. Once again, make sure the legs are at a 90-degree angle to the top of the bench in each direction.

Step Four
Raise the bottom shelf up, and prop it up with boards while you position and secure the 24″ by 48″ frame that will support the bottom shelf.
I propped the bottom shelf up with 2 by 4’s while I secured the frame that supports it. The height of the bottom shelf isn’t all that critical, so I just found two pieces of scrap wood to prop the frame up that made the bottom shelf about 10-3/4″ off the floor.
After the frame is in place fasten it to the potting bench legs using 2-1/2″ screws. I drilled pilot holes first to make inserting the screws easier. Once again, make sure the legs are plumb before fastening permanently. Drop the bottom shelf down onto the support frame and fasten down with 1-5/8″ wood screws.
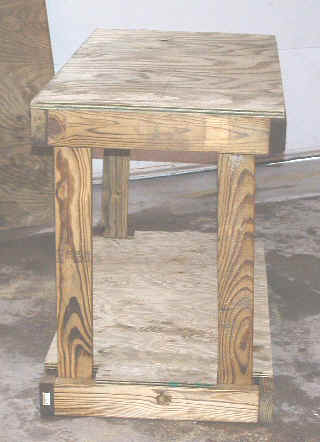
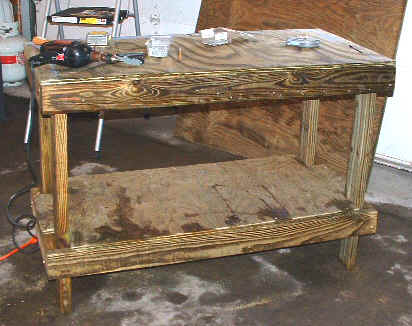
Your potting bench should now look like this.
Step Five
Now cut a piece of plywood 18″ by 48″ to act as the back of the potting bench. Also cut a piece of plywood 6″ by 46.5″ to act as the top shelf. To make the sides of the potting bench cut a piece of plywood 18″ by 24″. Draw a line diagonally across the piece of wood you just cut and then cut this board in half diagonally. You should end up with two pieces of wood that look like this:
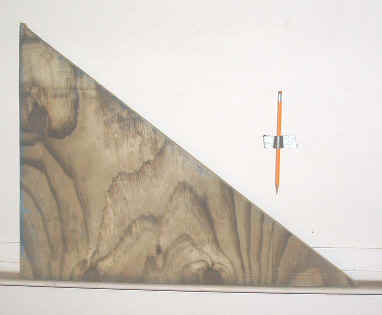
The horizontal dimension should be 24″ and the vertical dimension should be 18″.
Review the above photo and measure 18″ from the right angle along the bottom edge of the board. Use a square to draw a line upward that is square with the bottom edge of the board. The line will be approximately where you see the pencil taped to the wall in the above photo. Now cut along this line. Basically all you are doing is cutting the point off the triangle. Complete this process for both of the side pieces.
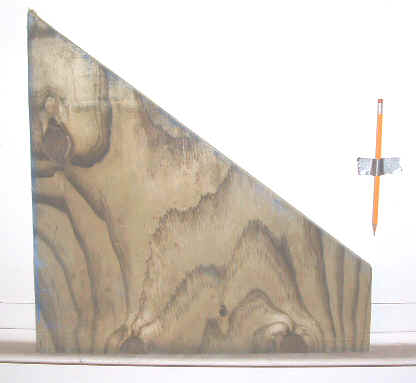
Your finished side pieces should look like this. Both sides of the right angle should measure 18″.
Step Six
Locate the piece of plywood that is 18″ by 48″, which is the back of the potting bench. Decide which side of this board you would like to be the inside of your potting bench and measure down 5″ from the top and drawn a line along the 48″ side of this board. This is where the top shelf is going to be mounted.
Now locate the piece of plywood that you cut 6″ by 46.5″. This is the top shelf of the potting bench. Cut a piece of 1 by 2 that is 46.5″ long. Mount this piece of 1 by 2 upright along the edge of the top shelf as shown in the photo below. This will take the bow out of the shelf. Use 1-5/8″ screws to mount the 1 by 2 to the shelf. Drill pilot holes through the plywood and insert the screws through the plywood into the 1 by 2.
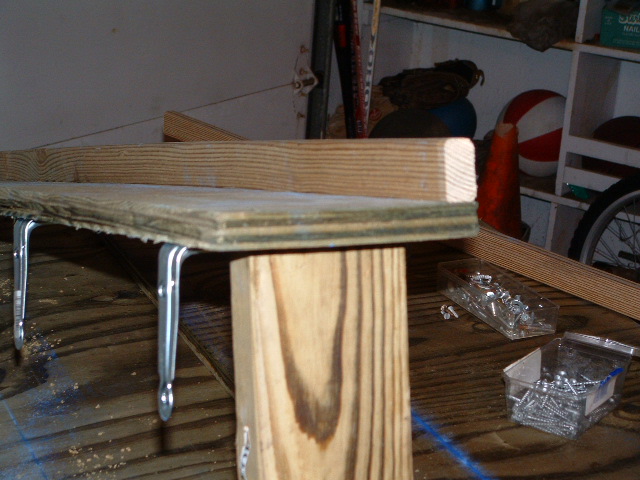
On the opposite side of the top shelf install the four 4″ by 5″ shelf brackets as shown in the above photo. Just space the four brackets along the length of the shelf.
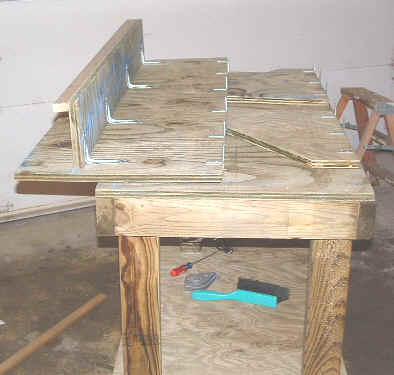
Along the bottom of the potting bench back install five corner braces as show in the photo below. Then install 3 corner braces along the bottom of each of the potting bench ends. Look closely at the below photo and you can see the back of the potting bench with the top shelf installed and the corner braces installed. You can also see the end pieces with the corner braces installed.
Now mount the top shelf to the back of the potting bench using the line that you have already drawn as a guide. The wood screws you use in this step should only be 3/4″ long, and even then, you might have to file off the points so nobody gets cut on them.
Step Seven
Install the two potting bench side pieces as shown in the photo below. Make them flush with the sides of the potting bench, but keep them in 3/4″ from the back edge of the potting bench. This allows room for the back of the potting bench to rest on the top of the potting bench.
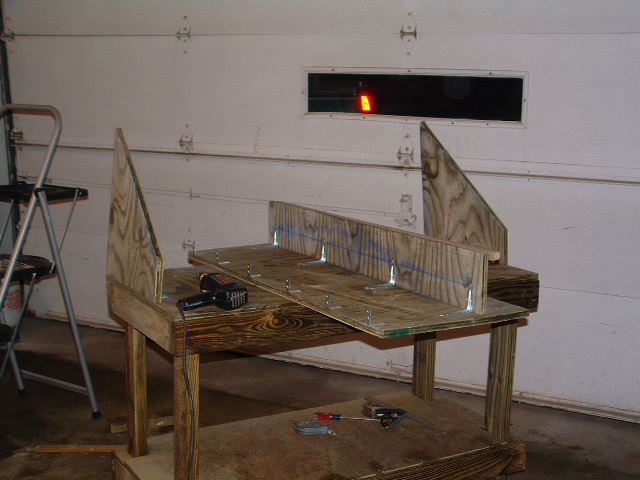
Slide the back of the potting bench between the two side pieces you just installed and allow it to rest on the top of the potting bench. Secure it in place with 1-5/8″ screws. After securing the back of the potting bench to the top and sides, put one screw through each side into the top shelf, giving the shelf additional support.
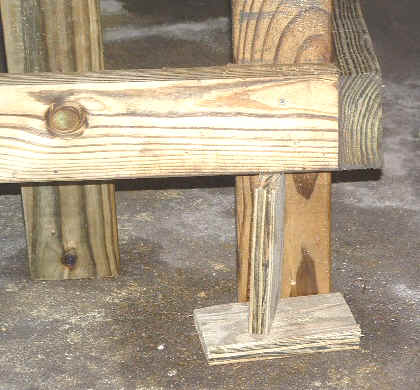
Now cut two pieces of 1 by 2, 44.5″ long, and two pieces of 1 by 2, 21″ long. Install the 44.5″ pieces across the back of the potting bench 6″ above the bottom shelf. Leave a 6″ gap and mount the other 44.5″ piece above the first one you installed.
Install one of the 21″ pieces on each end of the potting bench 6″ above the bottom shelf. The purpose of these boards is to keep pots and other objects stored on the bottom shelf from rolling off.
Your finished potting bench should now look like this:
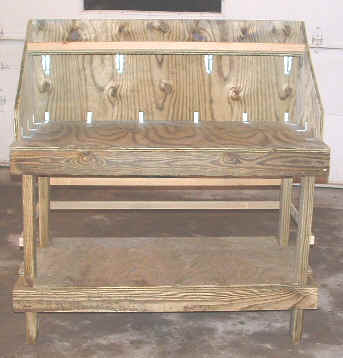
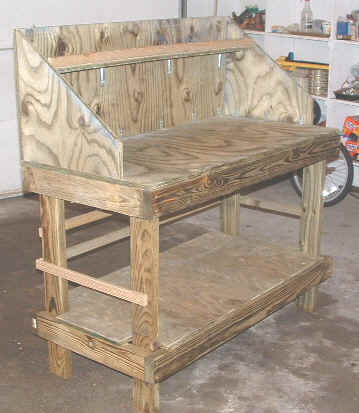
Mike McGroarty is the owner of McGroarty Enterprises and the author of several books. You can visit his website at Freeplants.com and read his blog at Mikesbackyardnursery.com.
Related Articles & Free Email Newsletter Sign Up
How to Build Your Own Deep Water Culture Hydroponics System
How to Create a Strawberry Pot Container Garden
Comment here