The secret to successfully preparing raised planting beds is to start preparing your new planting bed several weeks, if not months before you intend to plant. There are two primary reasons why you should use raised planting beds in your yard. One, the beds just look better, and a raised bed will actually “show off” your beautiful plants. The second reason is even more critical. Raised beds drain well and that’s critical with many landscape plants.
When you walk into any garden center or the gardening section of any discount store you will find more potions, notions, and magic “make my plants look great” formulas than you can imagine. But the truth is, if you plant your plants in a raised bed of good rich topsoil that drains well, your plants will do just fine without spending a lot of money on magic potions.
I installed the landscaping around my house over 15 years ago and I haven’t got around to fertilizing it. Yet the plants look great, and they grow like weeds. And the soil that I used wasn’t even all that great because it was mostly sand and gravel. But before I started, I raised the beds a good 10″ higher than the existing grade. I also installed plastic drainpipe on the ends of my downspouts so all the water from my gutters gets dumped out on the lawn and not in my planting beds. That makes a huge difference. Plants need water just like you and I but very few plants like wet feet. Any water they received should drain away quickly. Their roots need to breath and if the soil is too soggy, they can not breathe.
This brings me to one more important point. If you install your plants too deeply, they will suffer for the very same reason that I just mentioned. In a raised bed the top of the root ball should be slightly higher than soil of the bed, and then mound a little soil over the ball to keep it from drying out. The same thing is true for container grown plants. That’s why if you have clay soil and do not raise your beds, your plants will struggle forever, if they even survive.
Now let’s get on to preparing “weed free” raised planting beds. The first thing you must do is mark out the shape of your planting bed. Keep in mind that most people make their planting beds too small so don’t be afraid to make a nice big planting bed. As you mark out your bed make sure the curves are nice and gentle and can be easily maneuvered with a lawn mower. You certainly don’t want any hand trimming that is not necessary. There are a lot of ways to mark out your planting bed but the easiest is to buy a can of “Inverted Marking Paint” from your local hardware store. Inverted paint sprays upside down unlike most other spray paints. It’s available in a permanent paint formula, and there is also a chalk formula that washes right off. If you can’t find the chalk, the paint formula is perfectly fine.
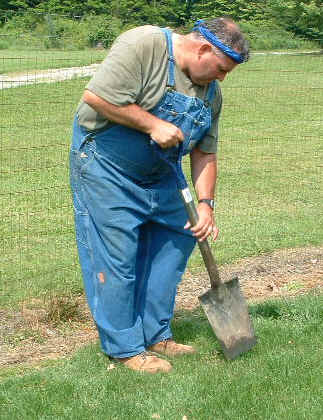
After you have the outline of your bed marked out take a good nursery spade and make a vertical cut along the outside edge of your mark like this:
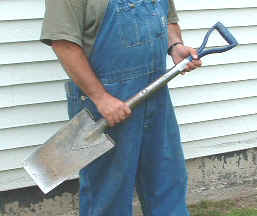
A good nursery spade is one of the best investments you will make as a gardener. Most people tell me they have a good spade but when I ask them how much they paid for it I know it’s not a good spade. A good spade will cost at least $80.00 but is worth every penny.
Notice the steel handle and that the blade is perfectly straight. The straight blade is important for edging beds etc. But what really makes this a valuable tool is its weight. Sure, it seems like its heavy to use, but once you learn how to use the weight of the tool to your advantage you will realize how much easier your work gets.
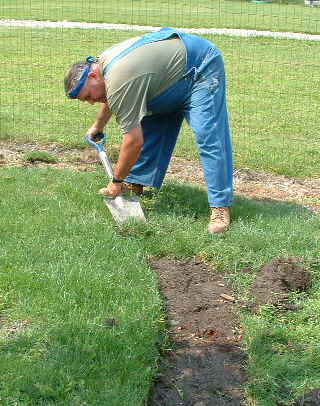
Once you’ve made a vertical cut along your line you can start stripping the sod back along the edge of your new bed. You should completely remove a strip of sod at least 12″ wide along the edge of your bed.
Stripping sod with a spade is a lot easier than you might think. Notice how low I am holding the handle of the spade. This allows me to just peel off the sod while only going about 3/4″ into the soil. I will also point out that a good quality nursery spade is made in such a way that the blade can be sharpened. You don’t want it razor sharp, but you want it sharp enough so the edge tapers down to a point and is not blunt. Working with a sharp tool makes all the difference in the world.
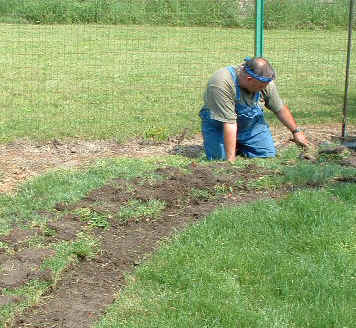
As you strip the sod in pieces you can take those pieces and lay them upside down inside of your planting bed. There is no need to haul them away because they will decompose into good rich topsoil. Once you have removed 12″ of sod all the way around your planting bed and turned it upside down on the inside area of your bed, you can fill the bed with good, rich topsoil to a depth of 6 to 10 inches.
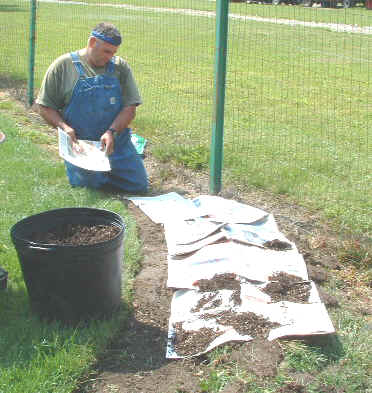
Once the topsoil is in the planting bed, you can start laying layers of newspaper over the topsoil. The newspaper should be about 8 pages thick, so it holds up while you are working with it. The purpose of the newspaper is to completely block out the sunlight so the grass and weeds you are covering up will die. Of course, you have to cover the newspaper with something organic to hold it in place and I prefer mulch.

The newspaper will remain in the bed forever. After the newspaper has been in the bed for a while it will get wet and decompose and when you are ready to plant you will be able to dig through it easily. You don’t have to and really shouldn’t remove it. Most newspapers today are printed with a soy-based ink so the ink is harmless.
Let’s review the sequence of events:
- Mark out the bed.
- Make a vertical cut along the edge of your bed.
- Strip the sod back 12″ along the edge of your bed.
- Take the sod you stripped and lay it in your planting bed, just make sure it’s upside down.
- Fill your raised bed with topsoil, raising the bed at least 6 to 10 inches.
- Cover the topsoil with newspaper, 8 layers thick.
- Cover the newspaper with 2 to 4 inches of any type of organic mulch. Here in northern Ohio, we use shredded hardwood bark mulch.
- Let the bed sit as is for at least two weeks, but several weeks or months would be ideal because the sod will be completely decomposed by the time you are ready to start planting. By then there will be little left of the newspaper.
That’s all there is to it.
Weed Barrier Fabrics Stink!
Yeah, that comment will upset some folks, but in my professional opinion they don’t work as promised. I really, really, really don’t like them. They don’t work in the long run because the weeds end up growing in the mulch on top of the weed barrier cloth. Keep in mind that as mulch decomposes it becomes topsoil, so you put down weed barrier cloth, then mulch which turns to topsoil faster than think. Now you have topsoil on top of the weed barrier cloth, or in other words, the perfect environment for weed seed germination. The wind blows in a few thousand weed seeds and you have a mess.
Trust me on this; once those weeds start growing on top of the weed barrier, they will root right through the fabric creating a gardening nightmare. Taking out weed barrier cloth once it’s overgrown with grass and weeds is no easy job. I’ve pulled out miles of weed barrier fabric and I can assure it’s a miserable job. My advice is to keep the foreign objects out of your beds. Newspaper is not a foreign object because it is organic and will completely decompose. Plastic and non-biodegradable fabric are foreign objects.
Mike McGroarty is the owner of McGroarty Enterprises and the author of several books. You can visit his website at Freeplants.com and read his blog at Mikesbackyardnursery.com.
Related Articles & Free Email Newsletter Sign Up
2 Ways to Eliminate Standing Water in Your Yard
How to Buy the Right Lawn Grass Seed
Plant Alliums This Fall to Add Variety to Your Garden
Shop for High Quality CBD Products
Subscribe to our Free Email Newsletter

Comment here