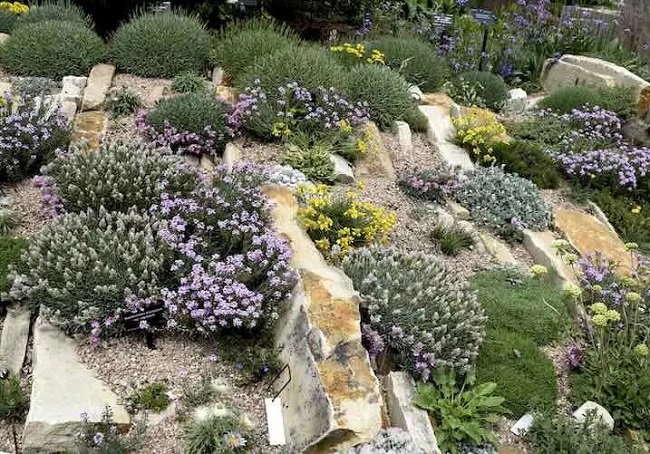
A crevice garden is a unique and captivating landscape design that mimics the rugged beauty of natural mountain crevices and rocky outcrops. Originating from alpine environments, crevice gardens have gained popularity for their ability to showcase a diverse range of plants while providing an eye-catching focal point in any outdoor space. Whether you have a small balcony or a spacious backyard, creating a crevice garden can transform your landscape into a stunning masterpiece. Here’s a step-by-step guide to help you bring this creative garden style to life.
Step 1: Choose the Right Location
Select a suitable location for your crevice garden. The area should receive adequate sunlight for most of the day, as many alpine and rock garden plants thrive in sunny conditions. Ensure the site has well-draining soil, as waterlogged soil can be detrimental to the health of the plants.
Step 2: Plan the Layout
Consider the size and shape of your crevice garden. You can create a large, sprawling design or a smaller, more intimate arrangement. Sketch out the layout, keeping in mind the natural appearance of mountain crevices and rock formations.
Step 3: Gather Materials
Collect the necessary materials for building your crevice garden:
Rocks and Stones: Choose a variety of rocks and stones in different sizes and shapes. These will be used to create the crevices and rocky features of your garden.
Soil Mix: Prepare a well-draining soil mix using a combination of sand, gravel, and compost. This mix will provide a suitable growing medium for your plants.
Plants: Select a diverse range of alpine and rock garden plants that thrive in your climate. Look for plants with compact growth habits, unique textures, and vibrant colors.
Step 4: Construct the Crevices
Arrange the rocks and stones in your chosen layout, creating crevices and pockets between them. These spaces will serve as planting pockets for your chosen plants. Position the rocks securely to prevent shifting over time.
Step 5: Prepare the Soil
Fill the crevices and gaps between the rocks with the prepared soil mix. Ensure that the soil is well-packed to provide stability for your plants.
Step 6: Planting
Gently plant your selected alpine and rock garden plants into the crevices and pockets. Position them at appropriate depths and spacings, and make sure their root systems are well-covered by soil.
Step 7: Mulch and Water
Apply a thin layer of gravel or small stones as mulch around the plants. This helps retain moisture, prevents weed growth, and enhances the natural appearance of the garden. Water the newly planted garden thoroughly to help the plants establish their root systems.

Step 8: Maintenance
Maintaining a crevice garden involves regular care:
Watering: Keep the soil evenly moist, but not waterlogged. Monitor the moisture needs of different plant species and adjust your watering schedule accordingly.
Weeding: Regularly remove any weeds that may appear in the planting pockets.
Pruning: Trim back any dead or overgrown plant parts to promote healthy growth and maintain the aesthetic appeal of the garden.
Fertilization: Apply a slow-release, balanced fertilizer in the spring to support the growth of your plants.
Creating a crevice garden requires patience and attention to detail, but the result is a stunning display of natural beauty that can be enjoyed for years to come. With careful planning, proper plant selection, and consistent care, you can craft a picturesque landscape that captures the rugged charm of mountain crevices right in your own backyard.
Related Articles & Free Email Newsletter Sign Up
2 Ways to Eliminate Standing Water in Your Yard
Creative Ways to Decorate with Large Container Plants
How to Design an All-Season Perennial Flower Garden for Fall
Subscribe to our Free Email Newsletter

Comment here