
I have a cat that is quite pesky. She jumps on my lap with her claws, she wakes me up in the morning and is always underfoot. Despite all her annoyances I love her to pieces. I come home from work and cannot wait to pet her. A favorite treat of hers is cat nip, and she goes nuts when she smells it.
This summer I was thinking about everything that I have grown over the years: vegetables, annuals, perennials, orchids and more, but I had never grown an herb. Cooking is not my forte so I never felt the need for herbs. I was at a garden center when I saw cat nip for sale. This piqued my interest and I bought it. Then I explored the rest of the herb section and found some catchy options: chocolate mint, lemon balm and French thyme. Suddenly my garden was filling with herbs. A friend gave me basil and parsley.
All the herbs grew and grew. Then I started to think that I should do something with these herbs. First on my list was the cat nip. I researched how to dry herbs online and then set to work. The process was incredibly easy.
- Herbs should be cut just before they flower. This is when they have the highest amounts of oil and will produce the best flavor. Of course I did not know this and cut the cat nip after it flowered but it still turned out fine. I cut each piece of herb as long as possible. My French thyme is the shortest, probably only 6” in length. The cat nip is the longest at 18”.
- Make sure to remove any leaves you do not want to end up in your mouth. This means pulling off shriveled leaves, leaves with holes half rotten leaves etc.
- Wash the herbs after picking because you can’t do that after they are dried. Tie the herbs with string, hang upside down and wait.
- Online it said to expect around a month for the herbs to be completely dry.
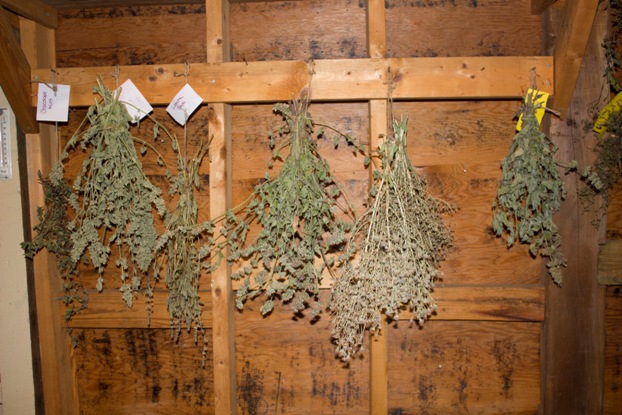
I repeated this process with each of the herbs. They now hang upside down inside my potting shed to dry. An avid cook would find it ideal having the dried herbs at arm’s reach inside the kitchen, but I do not want leaves falling onto the floor and making a giant mess. Don’t forget to label the herbs. While each bunch is distinguishable when cut, they quickly look alike as they dry. I tie a piece of paper to each bunch with the plant’s name.
While the internet suggested one month for drying time it took longer than that during summer. All of the humidity in the air kept the leaves moisturized for close to two months. The end goal is to have leaves that are crunchy. When you rub the leaves together they should crumble which signifies the herbs are ready.
There are other methods for drying herbs, which admittedly I have not tried. You can bake the herbs at the lowest setting possible in your oven for several hours. This provides you with herbs in hours, instead of weeks. Another drying method is to place the herbs in a dehydrator. Here again you will have herbs in a matter of hours. With large amounts of herbs a dehydrator can be useful.

After the herbs finish drying you can crush the leaves to a fine consistency and then store them in an air tight container. A zip lock bag or plastic bowl and lid will do the trick. Herbs are great for cooking and for gift giving. Sure enough, my cat loved her cat nip. She is wild for it. I give the left over herbs to anyone I know. Friends will turn down my Swiss chard, but no one turns down fresh herbs.
Lyndsey Roth is a frequent contributor to MyGardenAndGreenhouse.com.
Related Articles & Free Email Newsletter
Italian Herbs are Always Popular
Subscribe to our Free Email Newsletter

Comment here