Growing fresh herbs can transform even the plainest kitchen into a place of beauty. Even better, many common herbs are conveniently simple to grow and require little space. Due to the wide variety of leave shapes, color, and flavor; basil is enough to compliment a wide variety of meals and makes a beautiful kitchen herb garden alone or with the common pairing of sage or thyme. Popular varieties that will make for a stunning countertop or windowsill are sweet basil, purple ruffles basil, and lemon basil. Sweet basil is the most frequently called for in cooking, purple basil adds color, and lemon basil contributes an intense lemony fragrance. Your local nursery will likely carry all three varieties in the form of seeds and starters.
If you are starting from seed, select 3” – 4” pots and fill with a pre-moistened, quality medium that is light, and quick draining. Your Basil wants to be moist, but it should never be soggy because basil is extremely sensitive to water stress. Press down on the soil lightly to eliminate the air pockets. Drop two to three seeds into each container and cover lightly with about ¼ inch of pre-moistened sphagnum moss. Spray the tops gently to settle the seeds.
Many people cover the pots with plastic wrap after the initial moistening and until the seeds have germinated, which is generally within 5-12 days (sweet basil will grow faster than both the purple and lemon basil). Once you see the sprouts- place them in a south or west facing window. If there isn’t a good window available, 9 watts of LED lighting is enough to cover about a 15” x 45” area on a counter or shelf; just enough for a kitchen herb garden. Do not allow the fresh sprouts to dry out. Baby window basil may need watered twice a day initially, while LED gardens will likely need watered every three to four days. Be careful not to over water. A small oscillating fan gently blowing for a couple of hours a day will help simulate the plants being outdoors and make your seedlings shorter and sturdier.
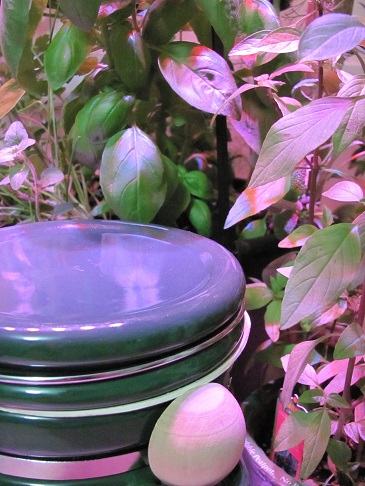
After 4-6 weeks your basil should be ready to transplant into individual 8” – 10” pots or one big pot leaving 6” – 12” between plants. I like terra cotta pots because the porosity creates better drainage and air circulation than plastic. Don’t be afraid to get creative with your kitchen containers as long as you can provide good drainage. Basil has shallow roots so a shallow pot will allow the roots to reach out and keeps the root zone warmer which basil likes.
Soil should be kept at a pH of at least 6.0 and below 7.5. After transplanting, pinch back regularly to keep one to two sets of leaves on each branch. Pinch back where the leaf meets the stem right above the baby set of leaves when they appear. Pinching back often encourages new growth and bushier plants. Basil is an annual so you may want to let one or two branches go to seed for next years garden but keep in mind that as soon as you let the basil go to flower, leaf production will slow down, and it will change the flavor of the leaves on the flowering branch.
Apply fertilizers sparingly because fertilizers can make the basil grow too fast and compromise the flavor and aroma of the plant. Once the initial transplant is done, your kitchen garden should take up only 5 – 10 minutes of your time a week to provide beauty and fresh herbs year-round.

Angela Lundmark enjoys gardening outdoors and indoors and freelance writer.
Related Articles & Free Email Newsletter
Dried Herbs Require Little Work and Offer a Great Reward
Italian Herbs are Always Popular
Subscribe to our Free Email Newsletter

Comment here